
Last Time on Tetris
About one month ago I started reverse engineering a mini Tetris arcade cabinet. In part one, I explored the surface level hardware and software to find what makes it tick, with the ultimate goal of getting it to play something other than Tetris. As the research went on, reality set in and it was clear that this goal was too ambitious.
However, a more reasonable goal is to own a completely unique and upgraded version of this toy. I’ll be breaking this up into another two separate posts: one on software upgrades, and another on hardware upgrades.
Getting Plaintext Data
My previous post incorrectly assumed that we were already looking at plaintext data. However, at the very end, it clicked that the images found in the ROM bear a resemblance to The ECB Penguin. For those unfamiliar, this image is a showcase of encryption gone wrong, where the “shape” of the original data remains visible but distorted.
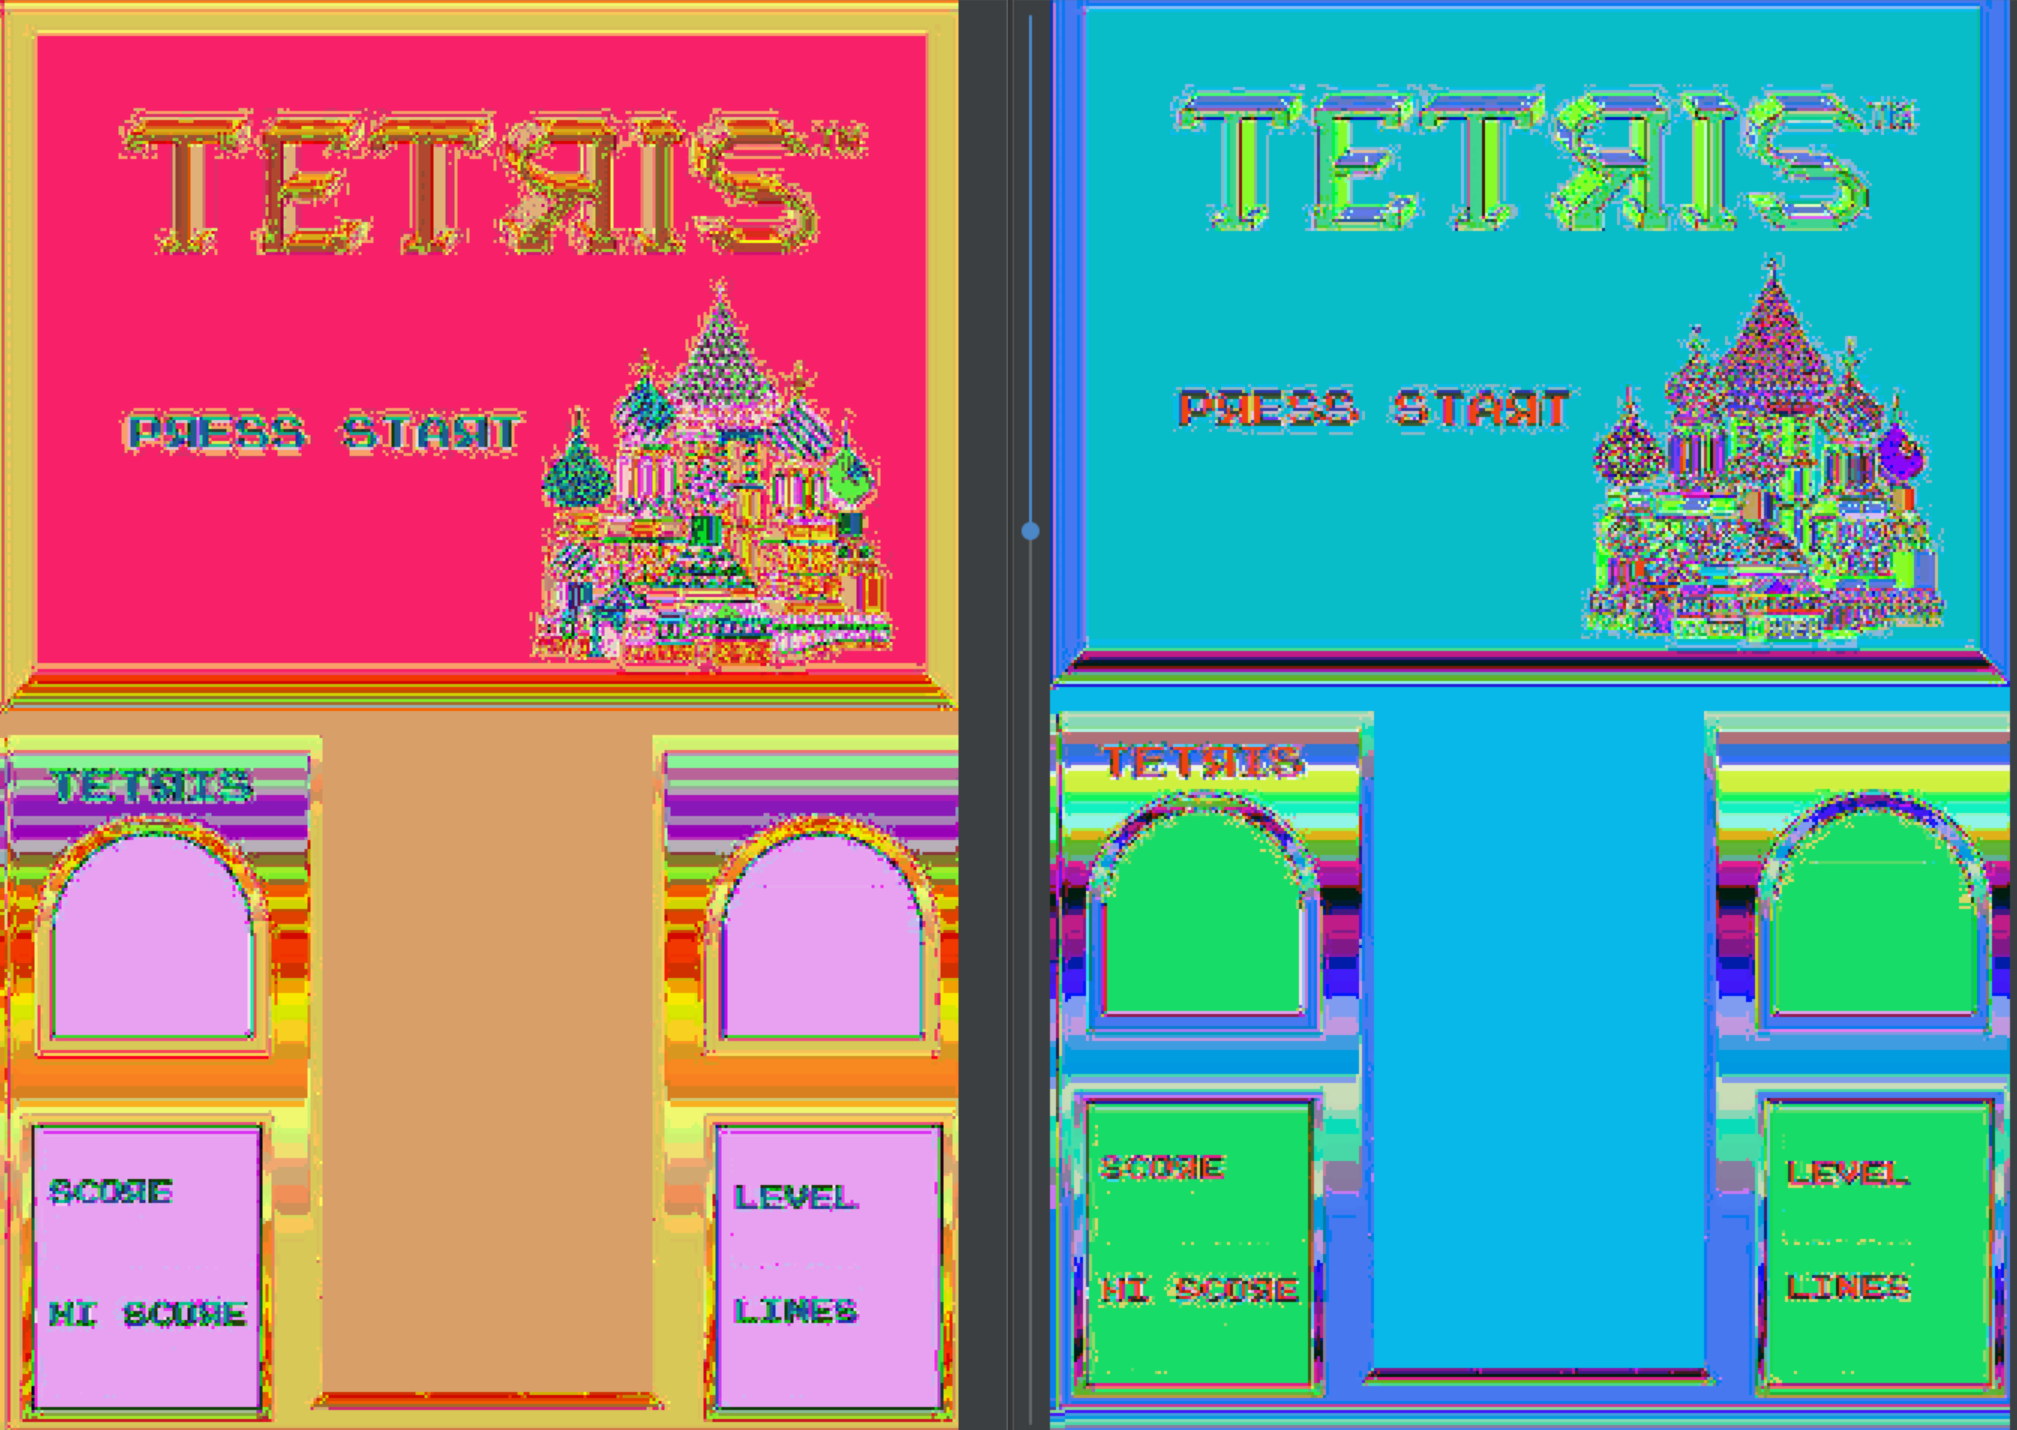
I originally attributed this to not knowing the proper encoding, but the rainbow of colors on the upper half of the lower screen tipped me off that something else is wrong. That rainbow is intended to be a smooth gold gradient, but the colors in my images are wildly different colors from top to bottom.
Decrypting
Taking a step back to the raw bytes, I loaded the ROM into ImHex. I only used this tool slightly in part one to split the blob into segments based on entropy, completely ignoring the actual bytes. However, as I scrubbed through the data top to bottom, I noticed a surprising lack of null bytes. I suppose there’s nothing saying that null bytes need to be used for padding between sections, but that is usually what’s done. Here, the little-endian word 0xDD0D appeared to be used as padding.
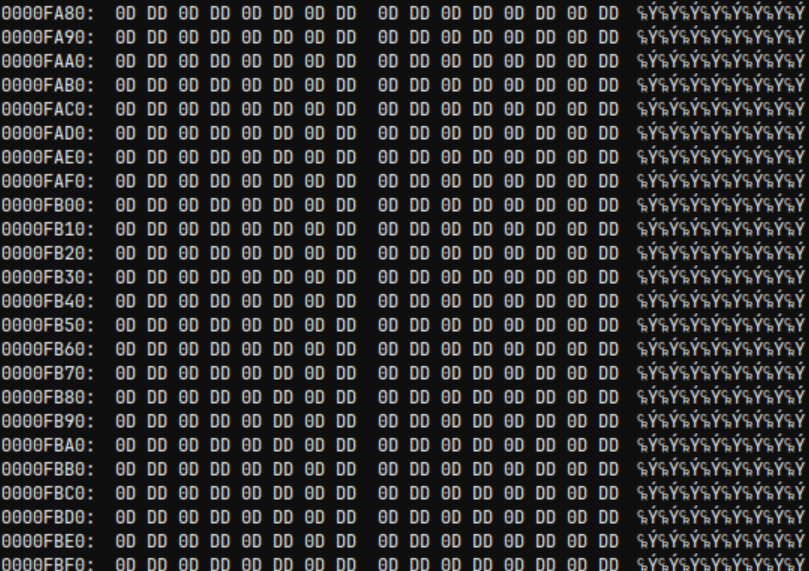
There are a few low-hanging fruits for encryption, but the one that I see most often in malware is to XOR all data with the same key. In this case we would want to change the padding to null bytes, so that key would be 0xDD0D. I wrote a simple Python script to XOR all words with 0xDD0D and loaded the result into TileMolestor to see how the previously found images appeared now.
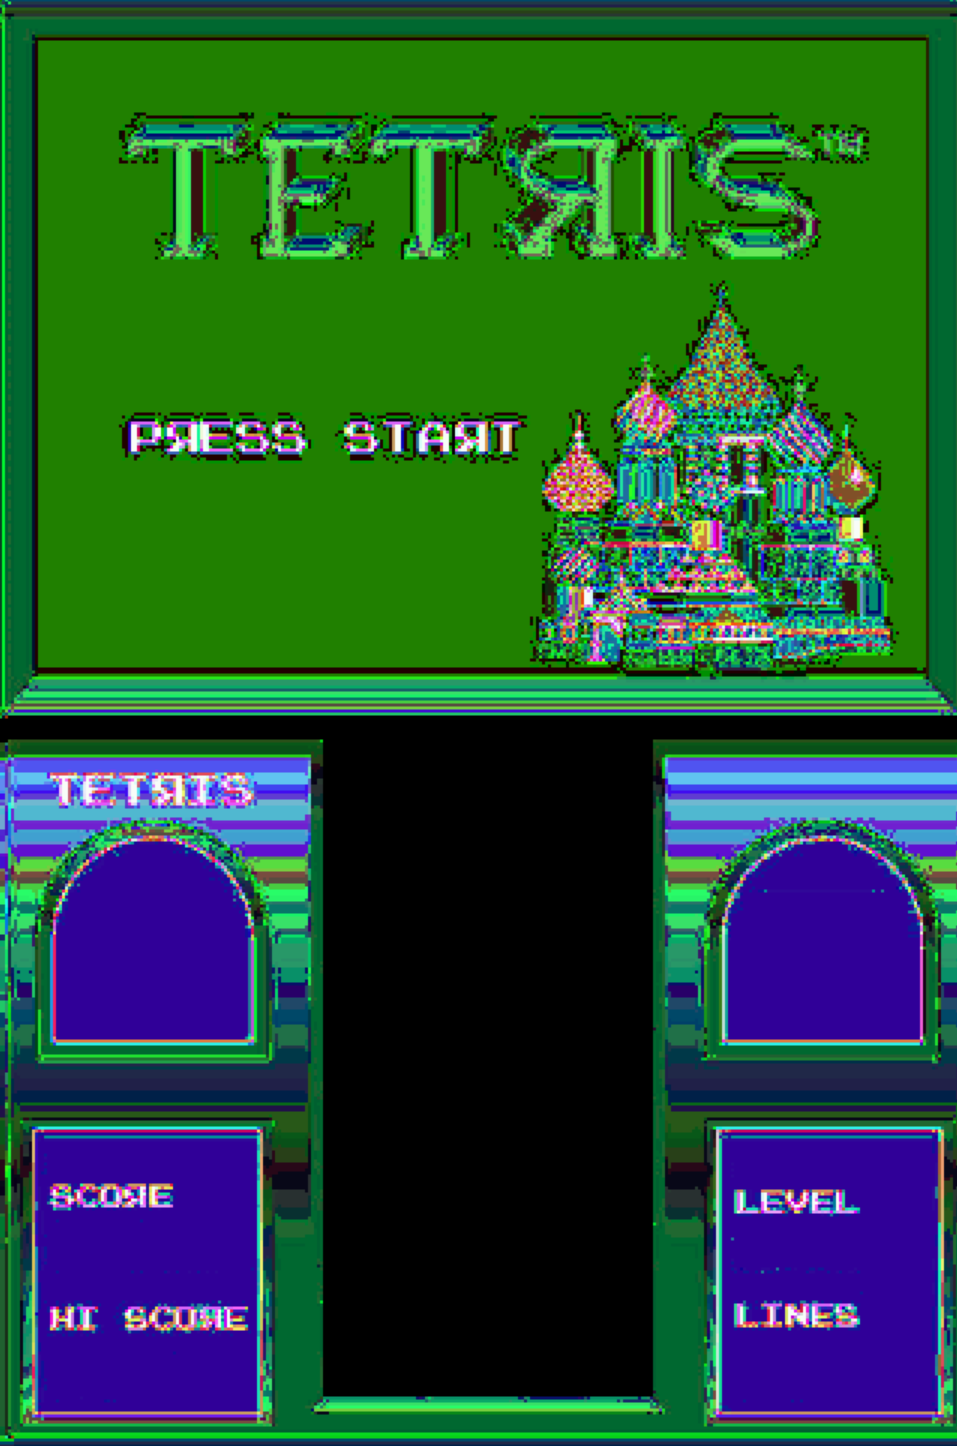
At a glance, this is hardly any better or worse than where we started. However, with a closer look, most of what I would expect to be black appears as black, and most of what I would expect to be white appears as white. On the other hand, the gradation remains wonky and the edges fuzzy.
Unscrambling
Clearly something remains to be fixed. Let’s consider black and white first: the RGB encoding used in the screenshot encodes black as all 0s and white as all 1s. In other words, the order of the bits would not matter. However, for every other colors, swapping two bits could drastically change the color that appears. This process is referred to as scrambling, and is an exceedingly common cost saving measure. It allows the hardware to be made for less money since costly vias between layers in the PCB can be avoided, and software can easily correct for the scrambled bits.
Diagnostic Mode
This toy has a special mode that can be entered by holding down the volume and start button while powering on; in fact, accessing a special mode in this way is not uncommon for electronic devices. I originally started looking for this mode since I found diagnostic messages while searching for image assets in part one. While in this mode, there are three extremely helpful screens: completely red, green, and blue screens.

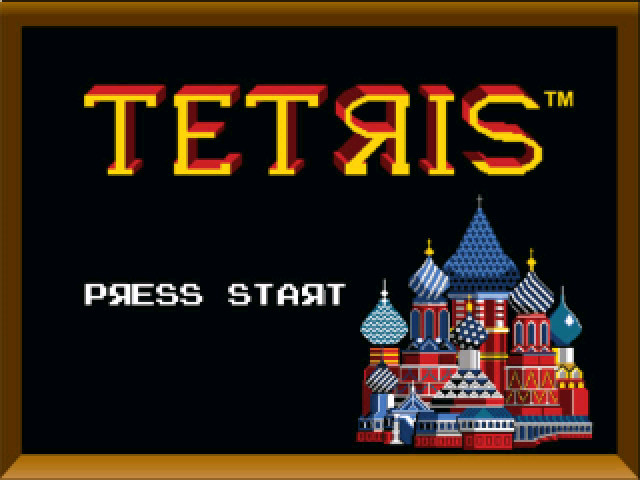
Large blocks of these colors do not appear in TileMolestor when scrubbing through the XOR’d contents, but there are three blocks of colors that appear just before the known screen images. These colors from top to bottom are reddish-brown, light gray, and dark teal. So, back in ImHex, all that needs to be done is to figure out a bit swapping scheme that changes these colors to red, green, and blue. I initially tried to change the reddish-brown to red, dark teal to blue, and light gray as green, but the images still did not look correct. However, after changing the order of the colors to gree, blue, and red, I was greeted with the sought after plaintext images.
Understanding the Code
Plaintext images most likely mean plaintext code. Though, we are actually not any closer to knowing the instruction set of the code nor its location.
Instruction Set Architecture
To my surprise, loading the plaintext ROM into ImHex reveals what seems like a file header: “GP-SPIF-HEADER–0123456789abcdef”. This is a new header for me, so I searched online for the exact string and ended up at a GitHub repository for something called unsp-monitor. The very helpful README for the repository goes on to explain that this header is present for some μ’nSP code and that one can download μ’nSP IDE and toolchain directly from the GeneralPlus website.
So the instruction set should be μ’nSP (probably pronounced micro-n SP). Out of the box, Ghidra does not support this instruction set, but there is a Sleigh file on GitHub. Additionally, there is a fork that appears to be even more comprehensive, which is what I decided to go with.
While I could try to dissect the ROM to extract just the code, I decided to load the whole 2MB file into Ghidra as a raw binary, since it’s not really that large to begin with. Furthermore, I probably would benefit from learning more about the ISA before continuing, but I decided to just learn as I go.
Memory Map
There is actually more to defining a new ISA in Ghidra than just the Sleigh file, and is wholly called a processor definition. For example, this processor includes patterns to match the start of functions during auto analysis. This allows me to hand off the heavy lifting to Ghidra, which reveals loads of great information:
- All music and SFX previously found in Audacity, but in a WAV format.
- Unicode strings that spell out a tutorial.
- 335 functions.
- 192 “Bad Instruction” bookmarks.
All of the Bad Instruction bookmarks appeared when calling a memory space that is initially null. I assumed these functions were directly related to the SoC, thus out of scope for what I care about. So, I wrote a Ghidra script to change the name of these functions from FUN_* to SOC_*. However, it turned out that functions with good bodies only called functions with bad bodies, so that assumption was likely to be wrong. However, consider the following instruction:
003ab9: 40 f0 33 cf call SOC_00cf33
Notice that the function being called is located at 0xCF33 and that the last two bytes of the instruction are that number in little endian. This indicates that the call instruction uses absolute addressing, not relative. This tells me that I need to rebase the code from 0 so that the calls “make sense.” Fortunately, the earliest FUN function starts at 0x1DF and the earliest SOC function starts at 0x91DF, indicating that a rebase to 0x9000 is likely.
Afterwards, further scrubbing through Ghidra revealed memory regions in 0x0000 and 0x7000 regions, so I also added uninitialized memory spaces for those. The provided the following final memory map used for all further reverse engineering:
| Name | Start | End | Size |
|---|---|---|---|
| SOC | 000000 | 000fff.1 | 0x2000 |
| P24C04C | 007000 | 007fff.1 | 0x2000 |
| MD25Q16C | 009000 | 108fff.1 | 0x200000 |
A Very Helpful Discovery
A lot of the functions are overwhelming when I have no idea what is going on. Despite the memory map, cross references (XREFs) to the audio assets and unicode strings are completely absent. Even so, as I was jumping between functions I found the one lifted corner I needed to begin to peel back everything: the WAV loading function.
In this function there are three DWORDS that decode as strings “RIFF”, “WAVE”, “fmt”, and “data”. These are all present in the WAV file header, strongly indicating that this function is responsible for loading and potentially playing WAV files for music and SFX.
Using XREFs to this function shows that the second parameter is the address of the WAV file to play. Well… not exactly, but the four least significant bytes line up well enough. Since SFX are strongly correlated to what is going on during gameplay, XREFs can also be used to give an idea of what is going on in other functions.
As a side note, the fact that only the least significant word lines up with the sound address indicates that the SOC region of memory is more likely to be a data region. Correcting this and changing the layout of the ROM might make analysis a little easier, but would take more effort than it’s worth. Instead, I made an enum with the addresses to make the decompiled code more understandable.
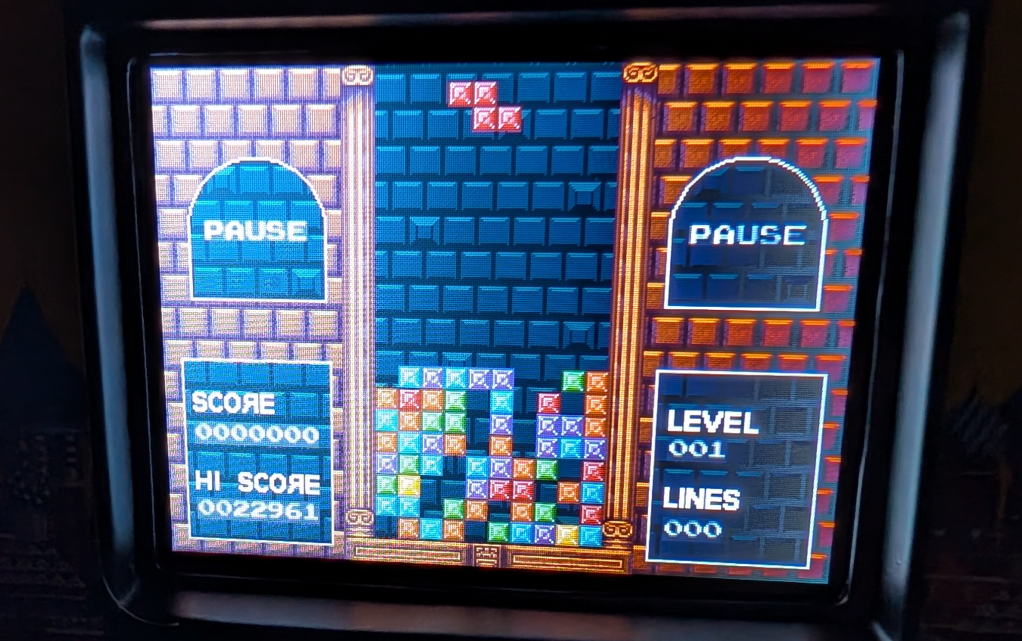
State Manager and Game Loops
Knowing the WAV function and the SFXs that play, I was most interested in finding the countdown timer that is played when starting a new game. This leads me to a function that initializes some global variables, calls a huge number of functions, plays the countdown timer, plays the music, then begins a loop that includes playing the “line clear” and “level up” sounds. I’m no expert in game development, but this looks to me to be a gameplay loop, thus has been named game_loop.
There is only one function that calls game_loop, which plays the sound heard when powering on the toy as well as the game over sound. With those hints alone it can be assumed that this is a state machine that drives game state, thus has been named state_manager.
Reverse engineering is often non-linear and difficult (or just boring) to describe. So, I won’t be documenting these functions line-by-line, but will describe individual discoveries as they are needed to perform bug fixes and software changes.
Fixing the Highscore Experience
Loss of Power
By far the most annoying bug in this toy is that it will power down while you enter your initials for a new highscore. This, in turn, causes the highscore to be lost. This is such a detriment that it is mentioned in several reviews on Target’s website for the toy. There are two aspects to resolving this: finding where the bug in code, and making the changes to fix the bug.
Finding the Code
From a high level, code is still executing when the toy loses power, so it’s not a power saving measure from the microprocessor. Instead, there must be a flag in software that is not being appropriately managed on the highscore menu.
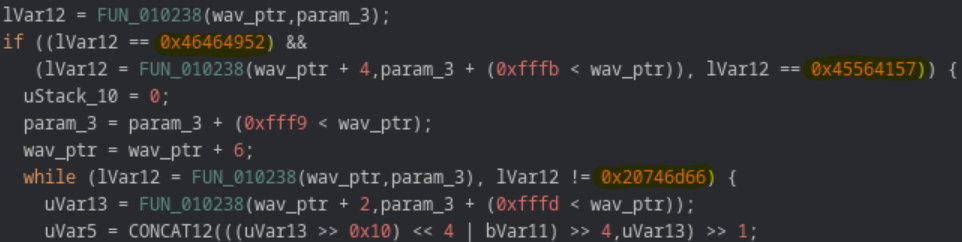
Through reverse engineering state_manager, two useful functions were found: read_input and menu_highscore_loop. Determining the constants for inputs (i.e. 2 being the start button) was mostly done by just reading the decompiled code. The discovery of menu_highscore_loop is mostly attributed to finding the global variable that stores the current score and statically tracing its use.
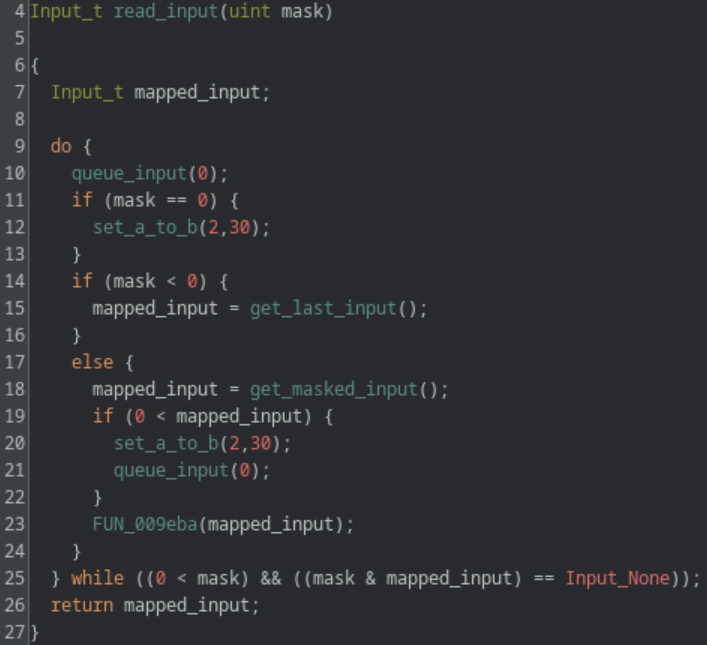
Nevertheless, within menu_highscore_loop there is only one call to read_input, which passes the value -2. I don’t fully understand what is happening in read_input but I do know that the value of the first passed parameter has the following effects:
- = 0: get input and reset the power timer to 30 seconds.
- < 0: get input.
- > 0: wait for specific input then reset the power timer to 30 seconds.
Fixing the Code
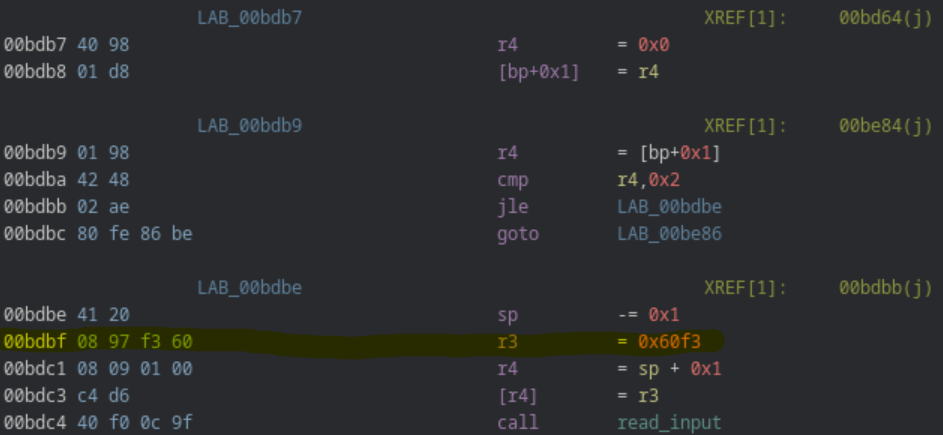
This leads to a possible (and simple!) bug fix of changing the value passed from -2 to 0. However, this results in different annoying behavior, where the input on this screen is extremely laggy. This is because passing 0 to read_input immediately returns, even if there is no input to read. This results in the entire screen being redrawn as soon as possible, even when nothing has changed. To get around this behavior, the masked input functionality must be used, which will only redraw the screen when valid input is received.
This introduces a fun problem: to pass -2 or 0 uses a 2-byte instruction, while the mask we want (0x60f3) would use a 4-byte instruction. There are some instructions after storing this value that can be optimized to use fewer bytes using a little assembly black magic. Sadly, I also want to make quality of life changes, which requires even more space than I can save.
The solution? Take the function and move it somewhere else. There is a good amount of padding I could have chosen to move the function to, but I instead chose the function that displays “demo mode.” This mode is only shown until a small plastic strip is removed from the toy after purchase, meaning I can guarantee that the function will remain unused for as long as I own the toy. So, I copied all bytes from the highscore input function and pasted them over a NOPd demo loop function. Then, starting at the instruction that now stores 0x60f3, I shifted everything down two bytes. From there it was a matter of correcting one call to the highscore function, and four goto instructions within the highscore function (both of which use absolute addressing).
Improving the code
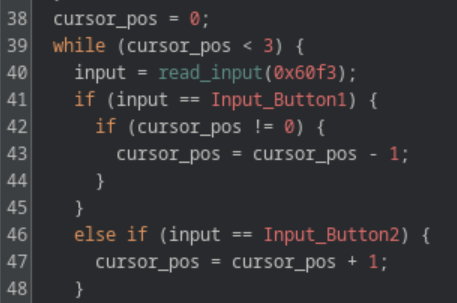
Another gripe I have with the highscore menu are the controls. You use left/right on the joystick to scroll through the alphabet and either of the rotate buttons to move the cursor only to the right. It makes more sense to scroll through the alphabet with up/down on the joystick, use the left rotate button to move the cursor left, and the right rotate button to move the cursor right.
Going back to the “reverse engineering is often non-linear” comment, I made this change before I realized I could just move the function. So I did, in fact, need to use assembly black magic. To change the controls of the alphabet from left/right to up/down, I needed to save four bytes. Fortunately, the assembly here was poorly written in the sense that the instruction r4 = [bp+0x0] is needlessly repeated. For example, the following changes left (0x20) to down (0x40) in the first compare instruction, but still uses the same number of bytes.
BEFORE
   *00ea9e 60 48                       cmp        r4,0x20
    00ea9f 15 4e                       jne        LAB_00eab5
    00eaa0 00 98                       r4         = [bp+0x0]
    00eaa1 0c 49 41 00                 cmp        r4,0x41
    00eaa3 04 ae                       jle        LAB_00eaa8
    00eaa4 00 98                       r4         = [bp+0x0]
    00eaa5 41 28                       r4         -= 0x1


AFTER
   *00ea9e 0c 41 40 00                 cmp        r4,0x40
    00eaa0 15 4e                       jne        LAB_00eab5
    00eaa1 00 98                       r4         = [bp+0x0]
    00eaa2 0c 49 41 00                 cmp        r4,0x41
    00eaa4 04 ae                       jle        LAB_00eaa8
    00eaa5 41 28                       r4         -= 0x1
The more difficult challenge is to add more functionality in the same number of bytes by allow the cursor to be moved left or right. Similar to the previous assembly, r4 = [bp+0x2] is repeated needlessly, allowing two bytes of wiggle room. That in addition to smart compares and jumps allow the new functionality to be included.
BEFORE
    00d1fb 40 f0 0c 9f                 call       read_input
    00d1fd 41 00                       sp         += 0x1
    00d1fe 02 d2                       [bp+0x2]   = r1
    00d1ff 02 98                       r4         = [bp+0x2]
    00d200 0c 49 00 40                 cmp        r4,0x4000
    00d202 04 5e                       je         LAB_00d207
    00d203 02 98                       r4         = [bp+0x2]
    00d204 0c 49 00 20                 cmp        r4,0x2000
    00d206 03 4e                       jne        LAB_done
  LAB_increment:
    00d207 01 98                       r4         = [bp+0x1]
    00d208 41 08                       r4         += 0x1
    00d209 01 d8                       [bp+0x1]   = r4
  LAB_done:
    00d20a 41 20                       sp         -= 0x1


AFTER
    00d1fb 40 f0 0c 9f                 call       read_input
    00d1fd 41 00                       sp         += 0x1
    00d1fe 02 d2                       [bp+0x2]   = r1
    00d1ff 01 98                       r4         = [bp+0x1]
    00d200 09 41 00 20                 cmp        r1,0x2000
    00d202 05 5e                       je         LAB_decrement
    00d203 09 41 00 40                 cmp        r1,0x4000
    00d205 03 4e                       jne        LAB_done
  LAB_increment:
    00d206 41 08                       r4         += 0x1
    00d207 01 ee                       jmp        LAB_done
  LAB_decrement:
    00d208 41 28                       r4         -= 0x1
  LAB_done:
    00d209 01 d8                       [bp+0x1]   = r4
    00d20a 41 20                       sp         -= 0x1
The keen eyed among you might notice a bug here… There is no check for if the cursor is all the way to the left or right. The original code handles this by submitting the initials when the cursor moves to index 3. However, I did not include any logic to prevent the index from going to -1. I was originally willing to accept this bug since there was no way to make more space for the necessary instructions, but now that the code is copied to a location with ample space, I can add the extra two instructions needed.
Lastly, I updated the text that is displayed on screen that explains the controls. This was as simple as changing some unicode strings while ensuring to not exceed the length of the original strings.
Fixing Forgetful Settings
One less annoying bug is how settings will be lost between games. For example, if sound effects are disabled in the settings, they are re-enabled after being sent to the main menu from a game over. Again, there are two aspects: finding where the bug is and changing the code to fix it.
Further reverse engineering of state_manager leads to a function I’ll call menu_loop, which executes while the user interacts with the menus of the game. It starts by initializing several global variables and enters a loop until the start button is pressed to begin the game.
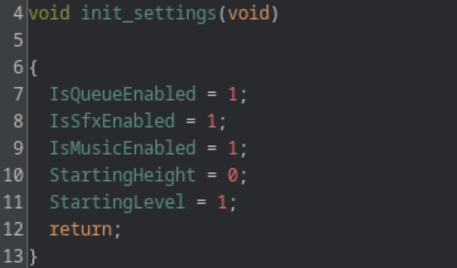
By patching the code to change the values that the global variables are set to, it was determined that 5 of these are the settings seen in the game:
- IsQueueEnabled
- IsSfxEnabled
- IsMusicEnabled
- StartingHeight
- StartingLevel
Furthermore, calls to play_sound are often guarded by IsSfxEnabled != 0, which provides further confidence that these are the global variables of interest.
The location in which these settings are initialized is problematic. As previously mentioned, state_manager is what plays the “game over” SFX. This means that after a game over, the sound is played, the high score screen is conditionally shown, and menu_loop is called again, thus re-initializing the settings to their default values.
The simple fix to this problem is to move the settings initialization outside of any loop, preferably before state_manager is even called. Given that it takes 50 bytes to initialize the settings, they will need to be marshaled to a new, small function. Similar to how the highscore function was moved, I moved the settings initialization instructions to a NOP’d region of demo_loop and called them from a function I call entrypoint. It was given this name since it calls state_manager and has no incoming calls.
Replacing Assets
With all the changes made to the functional software I wanted to make this version of the toy feel totally unique, by replacing all graphical assets with my own. This challenged my artistic skills much more than more software skills, but I decided to use assets from itch.io for inspiration of an “ancient civilization” theme.
I also changed the tetriminos to look like jewels to match the theme. This was more a challenge in tedium than skill, since there are several different version of each shape that are used in the game for some reason. However, I am very happy with the results and honestly believe they look better than the original.
Of course, I also changed the credits screen to a pixelated selfie with my name carved on my forehead (which was also used as the banner for this blog post).
Next Time
With all the software changed I wanted to perform completed, I am left only with hardware changes. The first thing I absolutely need to include is a better way to deal with the volume; the start up sound blasting at full volume every time the game is turned on is getting a bit old. I’ll probably want to add a rechargeable battery and battery indicator as well. I’m only limited by what I can think to do and the shipping time from another continent!